Bootstrap Clearfix Css
Introduction
Potential in our aspect implies and more desirable flexibility-- that is definitely what's never sufficient when we are actually sketching the very next layout for our brand-new project due to the fact that there regularly is a strong appearance idea or even two of them we abandon to try out implementing next time.But the feeling like something isn't quite done continue to keeps till we try to find a solution effectively executing this superb idea we had although the project was however being certainly developed on a paper.That is simply the way some creative workarounds just like the Bootstrap Clearfix Style get to life just to generate probably not the very best at all times yet still working solutions and assist us execute the things we originally were wanted. ( learn more)
Steps to utilize the Bootstrap Clearfix Usage:
Usually precisely what Clearfix executes is resisting the zero height container trouble whenever it comes down to containing floated components-- for instance-- supposing that you have only two components inside a container one floated left and the other one - right and you want to design the element containing them with a specific background color without having the help of the clearfix plugin the entire workaround will finish with a slim line in the required background color taking place over the floated elements nonetheless the background colored element is in fact the parent of the two floated ones.
To look after this the Bootstrap framework has the clearfix plugin featured so to achieve the needed final result coming from the earlier example all you need to have is just utilizing the class
.clearfixSituations
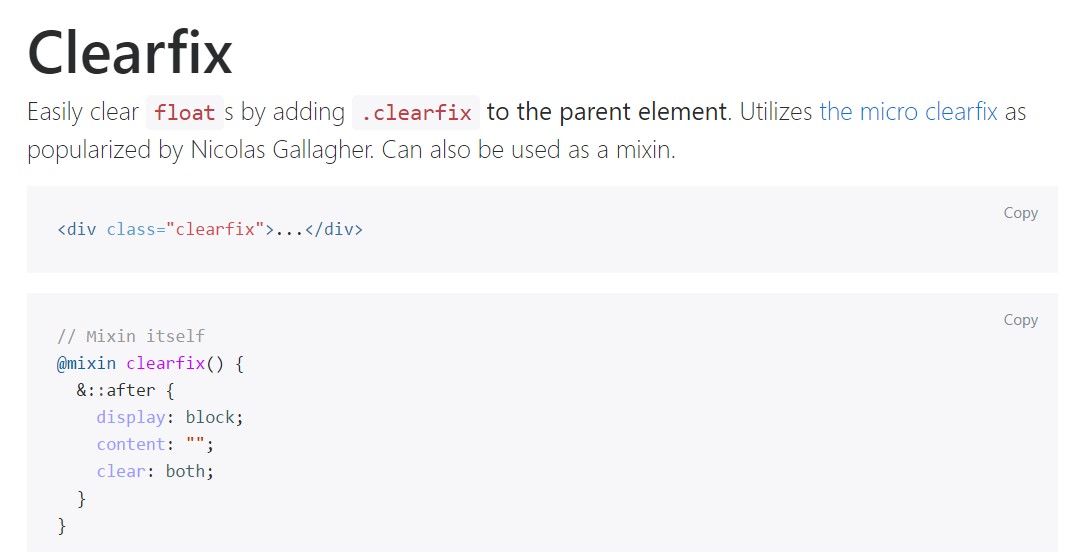
Easily clear
float.clearfix<div class="clearfix">...</div>// Mixin itself
@mixin clearfix()
&::after
display: block;
content: "";
clear: both;
// Usage as a mixin
.element
@include clearfix;The following good example presents just how the clearfix can be employed. With no the clearfix the wrapping div would not really span around the switches which would trigger a defective design.

<div class="bg-info clearfix">
  <button class="btn btn-secondary float-left">Example Button floated left</button>
  <button class="btn btn-secondary float-right">Example Button floated right</button>
</div>
Fresh Possibilities
In the current edition of among the most favored responsive framework-- Bootstrap 4 alpha 6 the clearfix is still fully assisted though sooner or later will most likely acquire less and less worked with and probably -- even left behind due to the fact that the dev team has considered making use of the flexbox format for many of the common page items-- it is definitely a more current and effective strategy for sizing, applying and allocating a particular element's children free from the need of floats and therefore-- the
.clearfixThis strategy is bright new for newest alpha 6 of Bootstrap 4 and might just be thought about rather a bold action since it also means releasing the IE9 service for and finest visual aspect of the pages created on modern-day web browsers only however as the modern technology progression moves this does not look like a potential trouble at all. Naturally there still be a number of circumstances when we will definitely still need to have the very good classic float techniques hence the moment we complete that-- we also have the
.clearfixFinal thoughts
So right now you find out things that the # in Bootstrap 4 means-- do have it in your thoughts every time you come across unpredicted appearance of several wrappers including floated elements but the best thing to execute is actually paying com time taking a look at the way the new star in town-- flexbox helps make the things completed considering that it delivers a fistful of convenient and pretty neat format sollutions to get our web pages to the very next level.
Inspect several video information relating to Bootstrap Clearfix
Related topics:
Bootstrap clearfix authoritative records
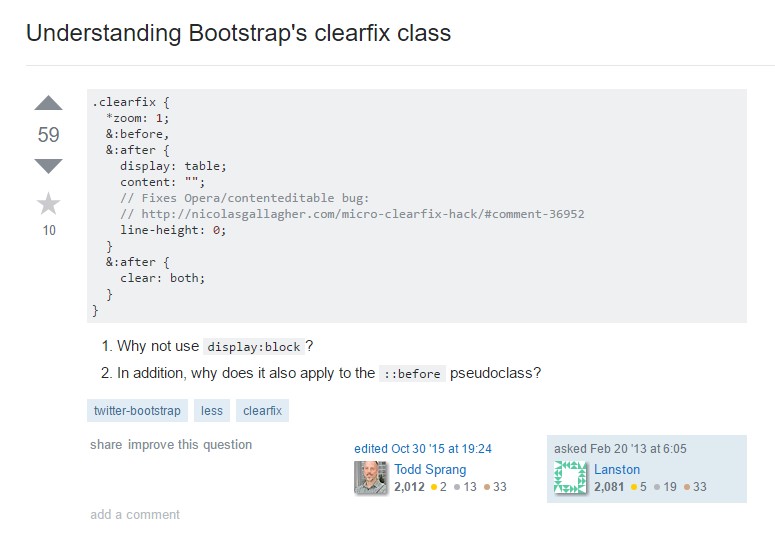
Recognizing Bootstrap's clearfix class
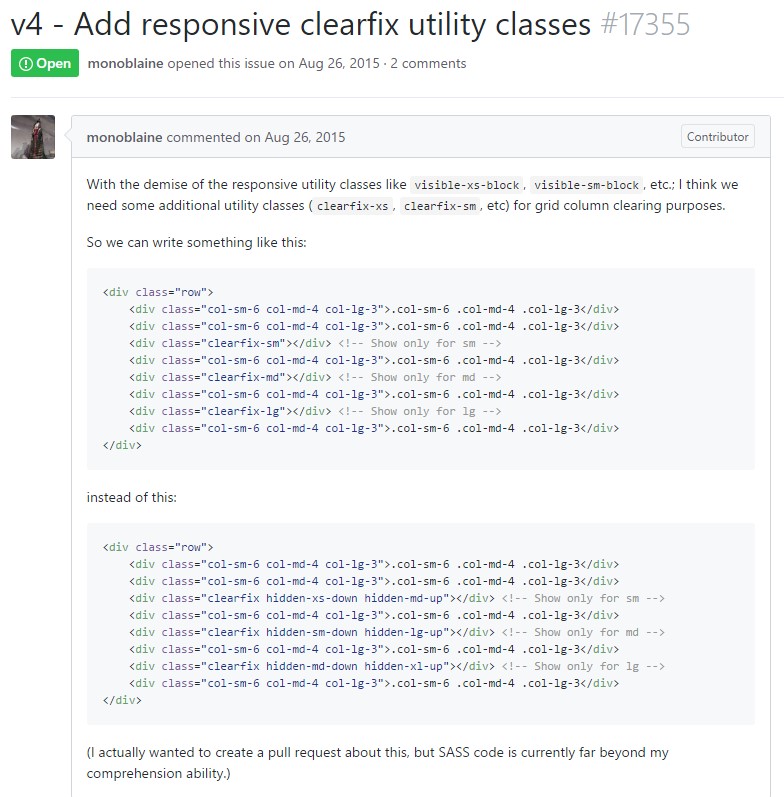
Bootstrap v4 - Add in responsive clearfix utility classes